 I’ve challenged myself to post 29 honey recipes in the next month – BEFORE Rosh Hashana.
Not just your Bubbe’s honey cake. As a beekeeper and avid cook I can take you and your honey places you’ve never been before- culinarily speaking.
So let’s get Buzzin’.
Bees repurpose everything. As minders/stewards/keepers of bees we take that VERY seriously.
This post is more about waste- specifically food waste and minimizing it. I may have ranted previously about how much effort is expended by the bees in creating honey. (1/12 teaspoon in a lifetime). The threshold I gave myself for any recipe posted in this series is that it should contain at a minimum 30g of honey = life’s work of approx. 71.5 honey bees. Fear not. We leave them plenty. They usually make 3x what they will actually use, and keeping it around takes up valuable living space and invites marauders.
Globally there is a serious issue with, of all things, bread waste – who knew? So many cultures consider their bread-of-choice a daily essential that bakeries around the world produce way more than they can sell. Check out this article/video about the problem, and a potential solution.
Just to be clear, challah ( חלה ) is the Hebrew word for bread. The finer points of what makes challah legitimately challah will not be covered here. If you need to know RIGHT NOW message me. To make this as challah (חלה) – technically – double everything. 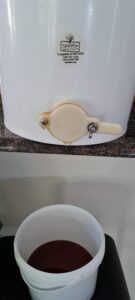
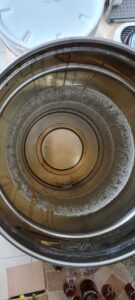
So back to thrift. Every drop of honey is precious. We do our best not to waste any of it. The liquid base for this challah is “honey water” – what we get when we rinse out the tank. We use this “honey water” in a variety of things (see Limoncello).
Using honey in your home-made bread can extend it’s shelf life! Have you ever wondered how to get the final sweet goo from your honey jar? Fill it 2/3 full with water, shake a bit, and save in the fridge to use for challah or other yeasted stuff. Although this contains the requisite 30g of actual honey, this is not a particularly sweet bread and we make it year-round. Our personal method of minimizing bread waste is to, well, not have any leftover.
Although this contains the requisite 30g of actual honey, this is not a particularly sweet bread and we make it year-round.
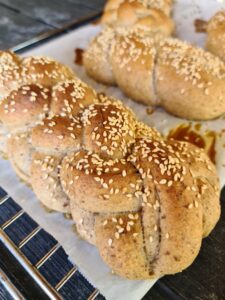
Thrifty Honey Bread
You will need:
- Stand mixer with dough hook or a serious bread bowl
- Oven
- Baking pan or sheet w/baking paper
- Kitchen scale
Ingredients – using grams here because I weigh everything bread 
- 110g Olive oil
- 280g Honey water- warm, not hot
- 30g Honey
- 3g Yeast
- 7g Salt
- 500g Flour
- 50g Flax meal
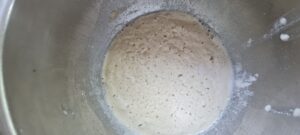 Phase 1 – yeast slurry
- Combine yeast and 150g of flour together in the bowl, then mix in the warm honey water until smooth.
- Park for 10-20 minutes until it begins to puff slightly
Phase 2 – knead 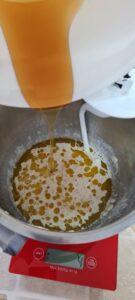
- Mix the oil, salt, and honey into the yeast slurry until dissolved
- Stir in the remaining flour and eventually knead for about 5 minutes
- the dough should be soft, but not goopy
Phase 3 – rest
- Allow to rest, covered- overnight in the refrigerator
This is a nice thing to do, but if you can’t handle the wait, just allow the dough to triple in bulk without the overnight stay in the refrigerator.
Don’t forget about it
Phase 4 – shaping 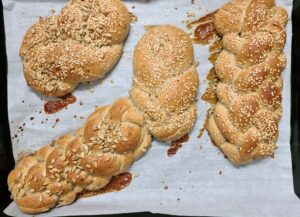
Remove your not-forgotten-dough from the refrigerator if you’ve been patient or preoccupied, and continue to be patient as you allow it to come to room temperature.
If you have been less-patient, proceed immediately to step 1 below.
- Punch down your risen dough
- Divide into desired sizes – this is a good time to think about that waste theme…
-
- Yes, this bread keeps well because of the honey content, but how much bread do you consume on a daily basis? This is your opportunity to size your loaves for consumption. Once baked this recipe freezes well. In lieu of investing in a French baguette recycling machine, making appropriate-sized loaves can minimize your waste.
-
3. Channeling your inner crafty-person or sculptor, shape your dough.
4. Place your formed loaves on the baking pan/sheet*
5. Cover and allow to rest for 20 minutes
6. At 20 minutes, begin preheating your oven to 180c
7. Completely optional step here – using some reserved honey water, brush your loaves and sprinkle with seeds
8. Bake for 20-25 minutes turning the pan halfway though. Your baking time will be impacted by the size of your loaves. Larger = longer baking time.
The loaves are done when they sound hollow when tapped. Allow to cool on wire racks. The air circulation is important
- *This is designed for free-form loaves. If you decide to use pans, please prepare a.k.a. grease them accordingly.